Friday, January 27, 2012

DIY Carpet Freshener: The Cheap and Easy Recipe

If you have many carpeted rooms in your home you probably spend quite a bit of time vacuuming them. And if you like your carpets to have a fresh, clean smell, you probably use some sort of carpet freshener. Well, the age of store-bought carpet freshener is over! For the Portland carpet enthusiast, nothing beats a homemade, DIY carpet freshener. It's fun to make, cheaper than store bought, and you can use your favorite scents to get the smell just right. Here's two of our favorite homemade carpet freshener recipes. Enjoy!

  • 1 cup of your favorite crushed dried herbs, such as lavender or rosemary
  • 1 teaspoon ground cinnamon
  • 1 teaspoon ground cloves
  • 1 teaspoon baking soda

Mix the ingredients well and sprinkle over your carpet. Let them sit for 5-10 minutes before vacuuming.

Baking soda also makes a great carpet freshener. Here's a simple recipe that has a baking soda base.

  • 1 cup baking soda
  • 1 cup cornstarch
  • 15 drops of your favorite essential oil

Mix the ingredients well and sprinkle on your carpet. Let the mixture sit for 15-20 minutes before vacuuming. You can store any excess mixture in a glass jar or other airtight container.

What are some of your favorite DIY carpet freshener recipes? Leave us your recipe in the comments section below!

portland carpet installation

Thursday, January 19, 2012

Carpet Installation: 5 Tips for a Quick Project

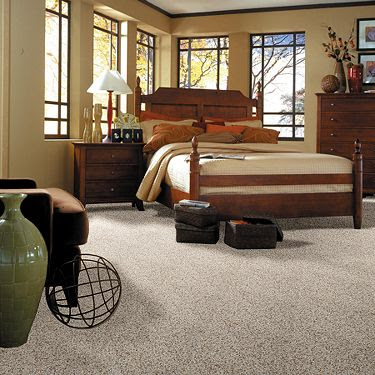
For many homeowners, installing carpet seems like a daunting task. Even the most experienced DIYers cringe at the idea of carpet installation. While it's true that DIY carpet installation can be difficult, it's not impossible. With the right tools, preparation, and instruction, you can properly install carpet in nearly any room in your home.

(That being said, it's important to recognize that DIY carpet installation is a difficult process. If you don't have a lot of experience with DIY home improvement projects, or you don't have the time, interest, patience, or resources to finish the project, you should probably leave it to a professional. Contact Buyright Carpet today to discuss professional carpet installation options.)

1. Properly prepare the floor.
Floor preparation for carpet installation is usually pretty minimal. Still, there are some important steps you need to take to make sure your floors are ready for carpet. When replacing carpet, make sure to pry up all the old carpet from the floor and tackless strip. Be sure to sweep, mop, and dry the floor completely - installing carpet over a dirty or moist floor can lead to floor and carpet rot in the future. Lastly, when installing carpet over concrete, make sure you know where the heating ducts are. If you don't, you run the risk of puncturing them when nailing the carpet into the concrete.

2. Get the right tools.
Assembling the necessary tools to properly install carpet is one of the hardest parts of the project. The following is a list of the equipment you'll need to properly (and safely!) install your new carpet:

  • Tackless strip
  • Saw/shears
  • Hammer
  • Masonry nails
  • Carpet padding
  • Heavy scissors
  • Utility knife
  • Duct tape
  • Staple gun
  • Chalk
  • Row cutter
  • Seaming tape
  • Rolling pin
  • Seaming iron
  • Power stretcher
  • Knee kicker
  • Trimmer
  • Stair tool
  • Gripper edge
  • Carpet!

Read all instructions carefully before using any of these instruments. If you don't feel comfortable using specific tools, contact Buyright Carpet and discuss professional installation.

3. Cut the carpet correctly.
There's nothing more frustrating than realizing you've incorrectly cut the carpet you're about to install. Not only is it a waste of time, it is a waste of money, too, and an expensive one at that. Always get exact measurements of the room before cutting, and remember to leave about 2 inches of excess carpet on each wall side. This allows for a bit of error and is easily trimmed later.

4. Stretch, stretch, stretch!
It's important when exercising, and it's important when installing new carpet. Attach the carpet to one corner of the room and use the power stretcher to stretch the carpet to the opposite wall. Attach the carpet to the tackless strip and follow the same procedure for the other opposing corners. This part of the installation process can be confusing and frustrating, so again, if you are unfamiliar or uncomfortable performing this step, contact Buyright Carpet to discuss professional carpet installation options.

5. Smooth and grip.
After trimming the excess carpet at each wall, use a stair tool, push the edges of the carpet between the wall and tackless strip. once this is done, you can trim the carpet at the doorway and install a gripper edge to hold the carpet in place.

Simple, right? Well, not exactly. These are just general tips for installing carpet in your home. The actual process is much more complicated. Contact a professional at Buyright Carpet today if you have any questions about your DIY carpet installation project. We'd be glad to help!

carpet installation

Wednesday, January 4, 2012

Cleaning Ceramic Tile Flooring - What You Need To Know

So you've just purchased and installed a brand new ceramic tile floor. Great! Now what? What kind of maintenance is required to keep it looking like new? What kind of cleaning solution should you use? What are some common problems people face cleaning ceramic tile? All good questions, friend. The following are helpful tips for cleaning and protecting ceramic tile flooring. Good luck!

1. Sweep
Dirt and dust can stubbornly cling to ceramic tile, especially if the tile has a textured surface. Your first step in the fight against tile grime is to get out the broom. Sweeping helps loosen trapped dirt and dust particles from the surface of tiles and can dramatically improve the look of your floor. You can even use a vacuum to get to the hard-to-reach dirt and debris stuck between tiles. Make sure your vacuum doesn't have a beater bar, though - those can scratch and chip ceramic tile flooring.

2. Use Mats
Doormats can be a ceramic tile floor's best friend. Placing mats at entrances will help catch dirt, mud, and other debris before it can be tracked onto your floor. Be sure to shake out or wash the mats often. If your mat isn't clean, it won't offer much protection against grime.

3. Mop
Ceramic flooring should be mopped every now and then to remove built-up dirt and debris that sweeping couldn't catch. Use only a manufacturer-recommended cleaner, as some cleaners are too corrosive to use on ceramic tile. Never use an abrasive scouring powder or steel wool to clean tile; you'll end up with a scratched floor.

4. Clean Regularly and Often
Nothing is as dangerous to the appearance of ceramic tile flooring as time. If you don't clean up spills and messes as soon as they happen, the dirt and grime can start to decompose and corrode the tile. Even something as simple as sweeping once or twice a week will work wonders in helping your floor age well.

5. Be Careful with Furniture
As we mentioned before, ceramic tile flooring can easily scratch. If you will be moving heavy furniture or appliances, make sure to use pads or mats to prevent scratching.

Questions about ceramic tile flooring installation or maintenance? Call us today at 1-800-638-5787, or email us at sales@buyrightcarpet.com.

White Ceramic Tile Flooring
Ceramic tile can be used for many different projects, including flooring, counter-tops, and sink backsplash tiling.